To help me with this, I had to call up my nerdiest friend, Chris.
 |
| From Z2 |
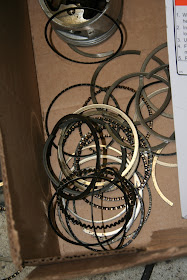
We started by pulling off all of the old piston rings. Be careful when doing this as all the heat from the motor will have made them brittle and prone to breakage when bent.
 |
| From Z2 |
Once all of the rings were off I inspected the ring lands to make sure that they were reusable and they all checked out fine.
 |
| From Z2 |
Next we installed the new piston rings.
 |
| From Z2 |
Make sure that you install the rings with the gaps facing the correct direction as advised by whatever rebuild reference you are using. The point here is so that none of the gaps are in the same place.
 |
| From Z2 |
Next we moved on to the crankshaft main bearings.
 |
| From Z2 |
We cleaned the block several times with Brakleen to make sure that it was nice and free of debris.
 |
| From Z2 |
Then we installed the bearings making sure that they all ended up in their proper locations.
 |
| From Z2 |
So fresh and so clean.
 |
| From Z2 |
Next we lubed up the rear of the crankshaft and installed the rear main seal onto the crank. Nissan says that this is incorrect, but they are chuckleheads and this way is best.
 |
| From Z2 |
Then, we lubed up all of the bearing journals with 20/50 motor oil and laid the crankshaft into the bearings, being extra careful not to ding the rear main seal or the journals on the crankshaft on the way in.
 |
| From Z2 |
The first cap to install is the rear main cap. This slides into the void shown below very snuggly. We ran 1" of SuperBlack RTV on each corner of the block to ensure a tight seal.
 |
| From Z2 |
Once the cap is installed, we slid the rubber seals, and shim nails into the RTV filled cap voids.
 |
| From Z2 |
Then we installed the rest of the caps, starting with the front and working our way back to the rear main. After they were all installed, we followed the proper torque order and torqued them all to the recommended 40ft/lbs.
 |
| From Z2 |
Now that the crankshaft is installed, it is time to install the pistons.
We installed the connecting rod bearings into the rods, and removed the end caps.
Then, using a piston ring compressor, we cranked the rings down to prep them for installing into the block.
 |
| From Z2 |
We inserted the piston into the block rod first until the piston ring compressor stopped on the gasket surface of the block. Then, using a shop towel and the wooden end of a hammer, we banged the piston into place being careful not to lose the connecting rod bearings from below, or ding the crankshaft journals. It is also a good idea to spin the crank until the piston that you are installing would be at top of its stroke. That way the connecting rod can seat correctly on the crank journal.
 |
| From Z2 |
Once the piston was in, we turned the block on it's side to thumb tighten the rod nuts.
 |
| From Z2 |
Repeat these steps for all six pistons.
 |
| From Z2 |
Flip the block and torque all of the connecting rod bolts to spec and you're done.
 |
| From Z2 |
Rotating assembly assembled.

sickk alex!! my favorite part of this blog is the nerd on top =P
ReplyDeleteWell done sir!
ReplyDelete