

 |
| From Z3 |
Showing posts with label Paint. Show all posts
Showing posts with label Paint. Show all posts
Monday, October 24, 2011
Tuesday, June 28, 2011
Some people just can't paint - So I moved on...
I am one of those people.
After repeated attempts to spray a decent clear coat, I have come to the realization that I need to skip it and move on.
I have the entire car sanded and ready for a final clear by a professional.
This paint job has seriously taken a bite out of my summer and I had to take a break from the car because of it.
But moving forward........
I picked up a set of 50mmx13mm extended studs from Touge Factory.
I like their style. They make a lot of their own parts and they are from Chicago.
Also, I have started refurbishing my wheel hardware.
As Cassio pointed out via comment on my last post, the wheels are three piece, but were welded together by the factory.
This means I can take all of the hardware out with little worry.
This will also allow me to polish up the wheel.
Following Brad's advice, I picked up a 5lb tumbler from Harbor freight. If you toss your rusty nuts in here with the proper abrasive, technically you should be able to remove the rust and get them looking good again.
Time will tell on that one.
I also was able to mount my fuel lines this past weekend.
With the help of my lovely girlfriend, I was able to get the feed and return lines mounted up along either side of the transmission tunnel.
Nice.
As you can see I also found a couple of spots that need a little wire wheel action and some Zero Rust. :)
Thanks to Brad and Cassio for the help!
I am back in go mode on this build, so thanks to everyone for the motivating comments on facebook and the blog.
Means a lot.
After repeated attempts to spray a decent clear coat, I have come to the realization that I need to skip it and move on.
I have the entire car sanded and ready for a final clear by a professional.
This paint job has seriously taken a bite out of my summer and I had to take a break from the car because of it.
But moving forward........
I picked up a set of 50mmx13mm extended studs from Touge Factory.
 |
| From Z2 |
I like their style. They make a lot of their own parts and they are from Chicago.
Also, I have started refurbishing my wheel hardware.
 |
| From Z2 |
As Cassio pointed out via comment on my last post, the wheels are three piece, but were welded together by the factory.
 |
| From Z2 |
This means I can take all of the hardware out with little worry.
 |
| From Z2 |
This will also allow me to polish up the wheel.
Following Brad's advice, I picked up a 5lb tumbler from Harbor freight. If you toss your rusty nuts in here with the proper abrasive, technically you should be able to remove the rust and get them looking good again.
 |
| From Z2 |
Time will tell on that one.
I also was able to mount my fuel lines this past weekend.
 |
| From Z2 |
 |
| From Z2 |
With the help of my lovely girlfriend, I was able to get the feed and return lines mounted up along either side of the transmission tunnel.
 |
| From Z2 |
Nice.
 |
| From Z2 |
As you can see I also found a couple of spots that need a little wire wheel action and some Zero Rust. :)
Thanks to Brad and Cassio for the help!
I am back in go mode on this build, so thanks to everyone for the motivating comments on facebook and the blog.
Means a lot.

Wednesday, June 8, 2011
How to fix a shitty clear coat - pt. 1
So with incorrect HVLP gun settings I sprayed down a clear coat that typical wet sanding and buffing couldn't fix.
No matter how much you sand, you can't fix a thin spot without adding more clear.
So naturally, with my tail between my legs I start wet sanding the whole car.
Using 800 grit wet sand paper, getting it as close as possible without burning through to the clear and ruining the metallic base coat.
My local paint pro says that I should just leave the little dips because the clear will fill it in if i apply it correctly with enough light coats (3 or 4), then I will have enough to sand down and buff to a shine.
This part looks ripply but is smooth to the touch.
Pretty much every single part needed sanding.
I will run through the whole car using 1000 grit tonight and wash it thoroughly.
Then I will be ready for a trip to gloss town.
 |
| From Z2 |
No matter how much you sand, you can't fix a thin spot without adding more clear.
So naturally, with my tail between my legs I start wet sanding the whole car.
 |
| From Z2 |
Using 800 grit wet sand paper, getting it as close as possible without burning through to the clear and ruining the metallic base coat.
 |
| From Z2 |
My local paint pro says that I should just leave the little dips because the clear will fill it in if i apply it correctly with enough light coats (3 or 4), then I will have enough to sand down and buff to a shine.
This part looks ripply but is smooth to the touch.
 |
| From Z2 |
Pretty much every single part needed sanding.
 |
| From Z2 |
I will run through the whole car using 1000 grit tonight and wash it thoroughly.
 |
| From Z2 |
Then I will be ready for a trip to gloss town.
Tuesday, April 26, 2011
Budget Garage Paint Job
So all of this preparation, disassembly, chemical stripping, cleaning, sanding drinking, humping, and dumping has all built up to this moment.
This is where the tear down becomes a build up.
It's time to paint her.
First things first, you have to setup your garage to paint.
You need to cover up your precious clutter.
Minimize wall damage.
And have some sort of ventilation so you don't kill your cat (or girlfriend) with fumes.
Then you need to clean all of your surfaces with a grease/wax remover.
This ensures that there is no blood sweat and tears still on your car from the tear down.
Then you need to pick a primer.
I chose Transtar's 2k kwik prime. this is a direct to metal, high build sandable primer. It is pretty much everything I could ask for. But not terribly cheap at about $100 for three quarts with the needed activators and reducers.
You need a good old spray gun.
I buy mine from Harbor freight because they are decent and disposably priced. I bought two of them for this paint job. One for the primer and one for the base and clear. See below for why I was glad I did.
This stuff is thick and sticks to everything.
And don't even think about spraying anything ever without a respirator. If you do not use one of these you will die.
Once everything is setup and you are properly equipped, mix your paint to the instructions on the back and spray it!
You will learn how to spray as you go. It's easy when you are spraying primer because if you f*ck it up you can just sand it off.
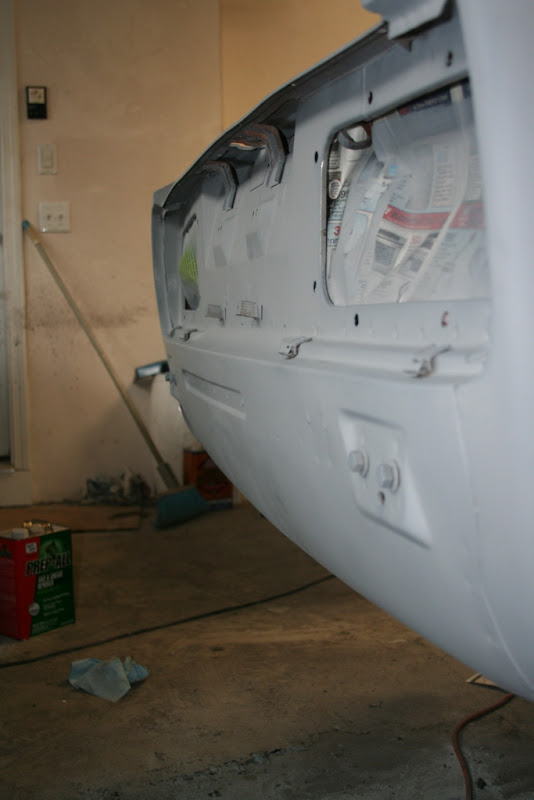
Once that dries completely you have to sand the entire car with a 400 grit sand paper. I chose to Wet sand the whole car because it works great, the paper clogs less, and there is no dust which is your mortal enemy when you are painting in your garage.
Then spray a second coat.
This time I wet sanded the whole car with a 600 grit paper since I was going to be spraying my base coat right over it.
After the car is completely dry, inspect it. look at everything. Every little detail, because i know you are going to miss something.
I made a list of all the little parts that needed just s touch up and tagged them all with the primer.
Once cured, sanded and cleaned. It's time for Base coat.
I used PPG Deltron 2000 DBC in a Nissan Paint code KV3. Nissan Called it "Grey Lustre", PPG calls it "Charcoal Metallic". The after market reproduction of this color is considerably darker than the OEM color which is part of the reason I liked it so much. It is truly exactly what I was looking for.
Makes me half wish I chose a satin finish. heh But in my opinion, satin colors look great on show cars and race cars. In the real world they just end up looking like lousy paint jobs. Unless of course you keep your car "show car" clean.
Now it's time for Clear.
I bought this clear because it was cheap and they recommended it at the shop. Either this clear is not the best, I suck at spraying clear coats, or both. I am not sure whether or not to recommend this based on my experience with it.
I am sure that this orange peel is due to my spray technique and my gun settings.
But the clear coat really makes that color look good.
That is the most accurate representation of how the color looks in person. Almost black from an angle, and dark ass grey metallic when you get up close.
I couldn't be happier with the color, but the clear needs some love.
I will be wet sanding and buffing tonight.
Wish me luck.
This is where the tear down becomes a build up.
It's time to paint her.
 |
| From Z2 |
First things first, you have to setup your garage to paint.
 |
| From Z2 |
You need to cover up your precious clutter.
 |
| From Z2 |
 |
| From Z2 |
Minimize wall damage.
 |
| From Z2 |
And have some sort of ventilation so you don't kill your cat (or girlfriend) with fumes.
 |
| From Z2 |
Then you need to clean all of your surfaces with a grease/wax remover.
 |
| From Z2 |
This ensures that there is no blood sweat and tears still on your car from the tear down.
Then you need to pick a primer.
 |
| From Z2 |
I chose Transtar's 2k kwik prime. this is a direct to metal, high build sandable primer. It is pretty much everything I could ask for. But not terribly cheap at about $100 for three quarts with the needed activators and reducers.
You need a good old spray gun.
 |
| From Z2 |
I buy mine from Harbor freight because they are decent and disposably priced. I bought two of them for this paint job. One for the primer and one for the base and clear. See below for why I was glad I did.
 |
| From Z2 |
This stuff is thick and sticks to everything.
And don't even think about spraying anything ever without a respirator. If you do not use one of these you will die.
 |
| From Z2 |
Once everything is setup and you are properly equipped, mix your paint to the instructions on the back and spray it!
 |
| From Z2 |
 |
| From Z2 |
 |
| From Z2 |
You will learn how to spray as you go. It's easy when you are spraying primer because if you f*ck it up you can just sand it off.
Once that dries completely you have to sand the entire car with a 400 grit sand paper. I chose to Wet sand the whole car because it works great, the paper clogs less, and there is no dust which is your mortal enemy when you are painting in your garage.
Then spray a second coat.
 |
| From Z2 |
 |
| From Z2 |
 |
| From Z2 |
 |
| From Z2 |
This time I wet sanded the whole car with a 600 grit paper since I was going to be spraying my base coat right over it.
 |
| From Z2 |
After the car is completely dry, inspect it. look at everything. Every little detail, because i know you are going to miss something.
I made a list of all the little parts that needed just s touch up and tagged them all with the primer.
Once cured, sanded and cleaned. It's time for Base coat.
 |
| From Z2 |
I used PPG Deltron 2000 DBC in a Nissan Paint code KV3. Nissan Called it "Grey Lustre", PPG calls it "Charcoal Metallic". The after market reproduction of this color is considerably darker than the OEM color which is part of the reason I liked it so much. It is truly exactly what I was looking for.
 |
| From Z2 |
 |
| From Z2 |
 |
| From Z2 |
 |
| From Z2 |
 |
| From Z2 |
Makes me half wish I chose a satin finish. heh But in my opinion, satin colors look great on show cars and race cars. In the real world they just end up looking like lousy paint jobs. Unless of course you keep your car "show car" clean.
Now it's time for Clear.
 |
| From Z2 |
I bought this clear because it was cheap and they recommended it at the shop. Either this clear is not the best, I suck at spraying clear coats, or both. I am not sure whether or not to recommend this based on my experience with it.
 |
| From Z2 |
 |
| From Z2 |
 |
| From Z2 |
I am sure that this orange peel is due to my spray technique and my gun settings.
 |
| From Z2 |
 |
| From Z2 |
But the clear coat really makes that color look good.
 |
| From Z2 |
That is the most accurate representation of how the color looks in person. Almost black from an angle, and dark ass grey metallic when you get up close.
 |
| From Z2 |
I couldn't be happier with the color, but the clear needs some love.
 |
| From Z2 |
I will be wet sanding and buffing tonight.
Wish me luck.
Subscribe to:
Posts (Atom)


 Posts


