Showing posts with label Paint Prep. Show all posts

Wednesday, June 8, 2011

How to fix a shitty clear coat - pt. 1

So with incorrect HVLP gun settings I sprayed down a clear coat that typical wet sanding and buffing couldn't fix.

From Z2


No matter how much you sand, you can't fix a thin spot without adding more clear.
So naturally, with my tail between my legs I start wet sanding the whole car.

From Z2


Using 800 grit wet sand paper, getting it as close as possible without burning through to the clear and ruining the metallic base coat.

From Z2


My local paint pro says that I should just leave the little dips because the clear will fill it in if i apply it correctly with enough light coats (3 or 4), then I will have enough to sand down and buff to a shine.

This part looks ripply but is smooth to the touch.

From Z2


Pretty much every single part needed sanding.

From Z2


I will run through the whole car using 1000 grit tonight and wash it thoroughly.

From Z2


Then I will be ready for a trip to gloss town.

Tuesday, April 26, 2011

Budget Garage Paint Job

So all of this preparation, disassembly, chemical stripping, cleaning, sanding drinking, humping, and dumping has all built up to this moment.

This is where the tear down becomes a build up.

It's time to paint her.

From Z2


First things first, you have to setup your garage to paint.

From Z2


You need to cover up your precious clutter.

From Z2


From Z2


Minimize wall damage.

From Z2


And have some sort of ventilation so you don't kill your cat (or girlfriend) with fumes.

From Z2


Then you need to clean all of your surfaces with a grease/wax remover.

From Z2


This ensures that there is no blood sweat and tears still on your car from the tear down.

Then you need to pick a primer.

From Z2


I chose Transtar's 2k kwik prime. this is a direct to metal, high build sandable primer. It is pretty much everything I could ask for. But not terribly cheap at about $100 for three quarts with the needed activators and reducers.

You need a good old spray gun.

From Z2


I buy mine from Harbor freight because they are decent and disposably priced. I bought two of them for this paint job. One for the primer and one for the base and clear. See below for why I was glad I did.

From Z2


This stuff is thick and sticks to everything.

And don't even think about spraying anything ever without a respirator. If you do not use one of these you will die.

From Z2


Once everything is setup and you are properly equipped, mix your paint to the instructions on the back and spray it!

From Z2


From Z2


From Z2


You will learn how to spray as you go. It's easy when you are spraying primer because if you f*ck it up you can just sand it off.

Once that dries completely you have to sand the entire car with a 400 grit sand paper. I chose to Wet sand the whole car because it works great, the paper clogs less, and there is no dust which is your mortal enemy when you are painting in your garage.

Then spray a second coat.

From Z2


From Z2


From Z2


From Z2


This time I wet sanded the whole car with a 600 grit paper since I was going to be spraying my base coat right over it.

From Z2


After the car is completely dry, inspect it. look at everything. Every little detail, because i know you are going to miss something.

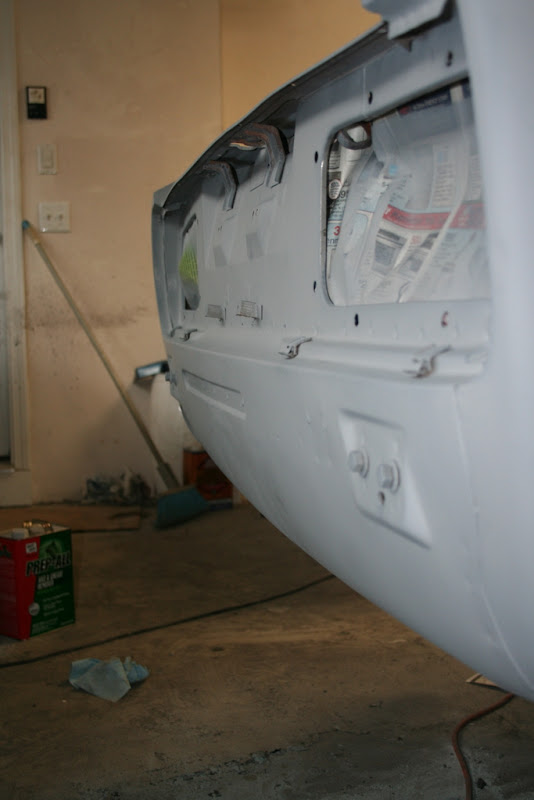
I made a list of all the little parts that needed just s touch up and tagged them all with the primer.

Once cured, sanded and cleaned. It's time for Base coat.

From Z2


I used PPG Deltron 2000 DBC in a Nissan Paint code KV3. Nissan Called it "Grey Lustre", PPG calls it "Charcoal Metallic". The after market reproduction of this color is considerably darker than the OEM color which is part of the reason I liked it so much. It is truly exactly what I was looking for.

From Z2


From Z2


From Z2


From Z2


From Z2


Makes me half wish I chose a satin finish. heh But in my opinion, satin colors look great on show cars and race cars. In the real world they just end up looking like lousy paint jobs. Unless of course you keep your car "show car" clean.

Now it's time for Clear.

From Z2


I bought this clear because it was cheap and they recommended it at the shop. Either this clear is not the best, I suck at spraying clear coats, or both. I am not sure whether or not to recommend this based on my experience with it.

From Z2


From Z2


From Z2


I am sure that this orange peel is due to my spray technique and my gun settings.

From Z2


From Z2


But the clear coat really makes that color look good.

From Z2


That is the most accurate representation of how the color looks in person. Almost black from an angle, and dark ass grey metallic when you get up close.

From Z2


I couldn't be happier with the color, but the clear needs some love.

From Z2


I will be wet sanding and buffing tonight.

Wish me luck.

Friday, April 22, 2011

Vacation - Pt. 4 - Body Work

A while back I had the misfortune of finding a large qty of body filler on my driver side door while stripping the paint.

From Z2


In the picture below you can see the point where I said "eff this" and moved on to something else.

From Z2


As with all things that get the "eff this" treatment, you have to confront it sooner or later. So I decided to tackle it last week.

From Z2


I don't even want to tell you how much bondo dust came off of this thing. It was truly absurd.

You can also see where the body shop drilled holes in the door to pull it out since there must have been a pretty good dent in the side of it.

From Z2


Since this was my first real experience doing any body work I decided to start smaller and do my roof first. There is a small ripple (that you can barely see) travelling from front to back down the roof.

This body filler came highly recommended by one of the better body shops in town.

From Z2


And here is the hardener they gave me. lol

From Z2


I guess the rule of thumb with body filler is that if you make a pile of filler about a half inch thick, just run a line of hardener from one corner to the other. This gets close enough pretty much every time.

From Z2


You just mix this paste until it is all uniformly light blue (or whatever color hardener you have) and it is ready to apply. I had approx 4 minutes to get it applied and smooth before the mixture became unworkable.

Usually my first try is my worst try, but this run came out perfect. Just a little raised and a pretty level height. One thing you want to avoid is creating a low point. This is a point of filler that is lower than the desired surface. when sanded smooth it will show as a pit and you will have to reapply.

From Z2


After about 10 minutes the body filler is ready to "grate". This takes all of the high points and peaks and shreds them. It is best to perform this step when the body filler is still slightly gummy but not soft.

From Z2


After about another 20 minutes it is ready for sanding. The body shop I spoke with recommended using 36 grit sandpaper on a block and then 80 grit to smooth it out. Using a 36 first will cut down on sanding time. Since my time isn't worth shit, I just used 80 grit so i wouldn't take off too much filler and have to reapply. This technique worked very well.

From Z2


Repeat steps on all dents and dings that cannot be hammered out.

This rear skirt is right next to my spare tire well so i was not able to hammer it out.

From Z2


After grating and sanding.

From Z2


From Z2


Now on to the door.

I had to mix up a hilarious amount of filler and did my best to keep the mixture and the ratios as close as possible.

From Z2


This pic is after my second application. I found low points and had to refill.

From Z2


Third and final.

From Z2


Luckily my passenger side door...

From Z2


Hood...

From Z2


From Z2


And Hatch...

From Z2


Were all in much better shape.


Oh shit.... Setting up for paint.

From Z2


From Z2


From Z2


From Z2


From Z2