Wednesday, April 24, 2013

Tank, Pedal Box, Fuel Pump, and Hydraulics

Finally getting around to posting my progress.

I took the time to refinish my gas tank straps. Basically just wire brushing the hell out of them and using a direct to metal Rustoleum paint called "Hammered" it leaves a very durable coat and a textured finish as you can see below. Most of my suspension components are painted with this.


the rubber insulators were shot so i had to create new ones. to buy them retail at Black Dragon or MSA was about $30. Garage door weather stripping is about $7.


this particular weather stripping had some nice ribs running down the center to add that extra level of insulation between the two metals. Perfect fit.


I used the amazing goop to adhere the strips to the straps.


Voila!


Then I mocked up the tank and had Emily take a pic to see where the fuel lines were going to be so i could get the proper length hose and all the correct fittings.


Tank installed.


A good friend told me that I should install all of the hydraulics before the motor. So refinishing and replacing all of that is my next step. These hardlines and junctions are all still good so I am going to refinish and reuse them.


I bought a new brake booster too from RockAuto. It came unpainted so I gave it a few coats of that hammered DTM paint I have been using everywhere.


This needs a little refinishing also. Wirebrush time.


Primary junction post wirebrush.
I hit the hardlines with a coat of paint too right after I took this pic.


My stock hardware had rubber gaskets in between them and the firewall. I had no interest in using the OEM pieces for this so I picked up some rubber repair sheets at Home Depot and made my own gaskets for everything. These were 6"x6" rubber sheets and came in a pack of three.


Since I was installing the brake booster, I had to install the pedal box because they all bolt up together. I also had to hook up the pedals to the actuating shafts for the booster and the clutch master.


The clutch master got a little gasket action also. Installed w/o lines.


Little paint goes a long way. I made sure not to get any paint inside the junctions.


Installed with hardlines and refinished. Not too shabby. Still have to run the front lines. (This is done but I don't have a pic yet.)


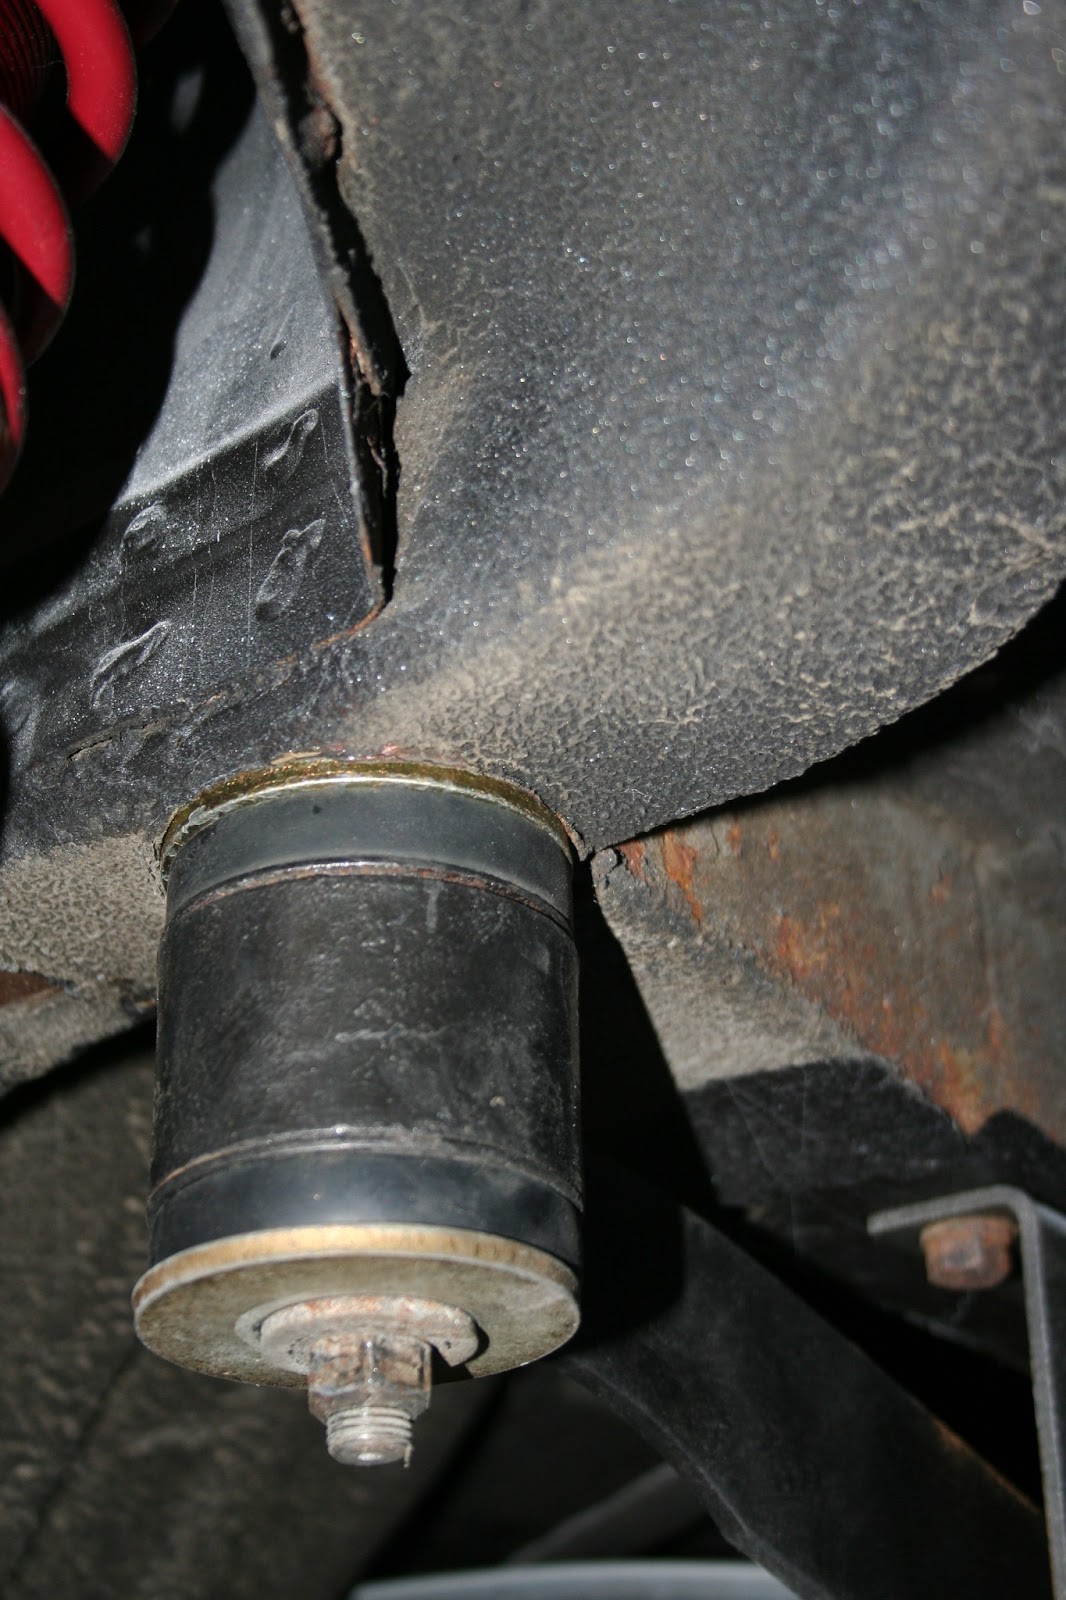
Also took this awesome pic of my fuel pump installed. i think i am going to reconfigure it so it doesn't hang so low. I made a thick rubber pad in between the pump hanger and the frame so hopefully that will help insulate the noise from this pump. I got the Carter P4070 which is low pressure (4-6 psi) and high volume (72gph free flow).


All brake lines are run now to all corners. I have to get a better pic of how the engine bay looks with the hardlines all properly run. I also took some time to wash the car so its not so dusty from the paint shop.


More pics to come soon.

Monday, April 8, 2013

DOIN' WERK!

Hey Guys, got a massive update here from all the work done over the weekend. Try to keep up! :)

First thing I did was press the old bushings out of my mustache bar. My hydraulic press made short work of this.


Also decided to finish painting the engine. Starting with the oil pan.


While I was letting that dry a bit I located all of the hardware for the rear-end. This is where all of that pain staking bagging and labeling becomes the difference between re-assembling your car, and selling your unfinished project on craigslist. Critical move.


This book on restoring your Z car proved to be an amazing resource too for locating parts and their proper place and use. You would be surprised at how tough it can be to figure out what stuff is.


For example, what on god's green earth is this thing?


I ended up learning that this is a block of metal that bolts to the bottom of the diff mount. WHO KNEW!??!?


Moving on, I ran through all of my remaining Energy Suspension bushings to find the ones that I still have left to replace. One of the most significant steering/handling upgrades is actually this rubber hockey puck in the steering shaft. This is the old one.


See the difference? The rubber one in the car was so flexible I could bend it easily with my fingers. The new urethane one was WAY stiffer.


Installed.


I wanted to get a nice finish on the valve cover so I removed it and brought it to by clean room (dirtiest room in the house), and painted it on my professional painting surface (pile of tires).


Taking my sweet time yielded some decent results. On or two small runs but I wont tell you where they are. :)


Also painted the rest of the motor silver. Since i have to strip the mating surfaces because I forgot to tape off the motor before I primed it, I decided to just go ahead and finish and clean it up once.


But shes lookin pretty sharp.


My buddy Nelson came over to help me install the differential.


All cued up.


After some wrestling and engineering we managed to get it up and in.


We also installed the mustache bar Energy Suspension bushings and bolted them up to the car with the diff.


DOIN' WERK!!!!


BLAM!


POW!


Axles in yo.

Thanks Nelson!

Then it was time to visit the original 240z Motor.
I need the starter and tranny off of it because the tranny that came with the L28 is trashed.


Unbolting the trans and the clutch plate.


Unbolted it all and brought it outside for degreasing and a pressure washing.


Not perfect but a Major improvement. The rest of that is baked on and I'm not going to bother removing it.
I let it soak for a half hour so that stuff isn't coming off without a chisel.


Also got all of my fuel system parts together and started mocking them up to make sure everything is going to fit.


Very excited for the next steps! Drive train should be coming together soon!


Wednesday, April 3, 2013

Optimus Primer

So I decided to do a simple silver and black motor. Black Valve cover and oil pan and silver block and head. All of the other stuff is going to be silver and black including all of my AN fittings so i guess that works out ok.


I had to hit up Autozone for some high temp primer. The VHT stuff in the middle is the primer. Decent build quality too after spraying it down. High temp Rustoleum black left over from painting my Diff (silver and black) and this duplicolor silver that i had kicking around.


Almost makes me wish I was going to paint it some wild splatter paint or something but either way its looking clean.


Heads up tomorrow, color is going down.