Tuesday, November 29, 2011

Guest Post: Protecting Yourself from Dangerous Materials in Classic Cars

A couple of weeks ago I was contacted by Brian Turner regarding the harmful materials that exist in classic cars and getting the word out that there are real dangers to look out for when handling them.

The following article was written by Brian for the benefit of the classic car community. Please take a few moments to read this and check out the infographics as I feel that this information is something that everyone should know.

=================================================================

Protecting Yourself from Dangerous Materials in Classic Cars

When rebuilding classic cars, in addition to the problems of sourcing out of production parts, and wrestling with corroded bolts, mechanics need to be aware of materials that could be hazardous to their health. Asbestos was used indiscriminately throughout the American auto industry's heydays from the 1940's into the 1990's. Today we know that this man-made, fibrous compound is carcinogenic. But in the 50's, 60's and 70's, asbestos was praised, and widely used in brake pads and clutch plates. The fibrous, lightweight and durable material is highly heat resistant, cheap and lightweight. Its mild abrasive characteristics made it the perfect material to embed in other fibrous materials to extend the lifetime of these disposable parts.


From Z


When
working on classic cars and changing out the brakes or clutch mechanisms, mechanics and car enthusiasts should protect themselves from this material. In its undisturbed form, asbestos doesn't post a threat. However, if the dust which is produced by brake and clutch pad normal use becomes airborne and inhaled, the fibers can metastasize into the lethal lung cancer Mesothelioma.

Many adverse effects associated with
asbestos exposure have been well documented. Studies of exposed workers, and family contacts of works, even those living in close proximity to asbestos mines have all demonstrated a higher risk to Mesothelioma. Therefore, when working on these parts, owners should take industry-approved precautions to protect themselves.


From Z


When working with brakes or
clutch plates, wear full, disposable coveralls, and protect exposed skin on your hands and neck. Workers should wear OSHA approved respirators at all times, and make sure they have the proper cartridge to protect from airborne fibers. When disassembling the mechanisms, they should wipe the assembly down a damp cloth before they start, and then wipe down each part as it's removed from the vehicle. Parts manufactured with asbestos should be disposed of properly in a closed container, labeled as a biohazard. After the affected parts are removed, spray the assembly and parts down with an appropriate degreaser or cleaning agent, and then once again wipe the parts down with a damp cloth. Allow them to dry before using.

Once the job is complete, dispose of the paper coveralls, and immediately wash any clothing, gloves, hats or safety gear you were wearing. Your goal is to eliminate the possibility that you, or anyone you contact during the process breathe in any asbestos fibers. Although the following products do not produce as much asbestos dust, you should take similar precautions when removing old head and engine hood liners, gaskets, and valve packing. These materials were also manufactured with race amounts of asbestos during the years in question.

Finally, you should also protect your lungs when sanding any old paint, or rusty metal surfaces. Inhaling oxidized metal or lead paint dust can also lead to serious health problems. Protect your exposed skin, wear a respirator and work in a well-ventilated, environmentally controlled workshop when dealing with any of these products.



=================================================================

Tuesday, November 1, 2011

ZCCNE Cookout Camp Onaway 2011

Well its the end of Z season in the Northeast and the Z Car Club of New England celebrates the year by having its annual cookout at Camp Onaway.

From ZCCNE Cookout at Camp Onaway 2011


Good turn out this year even though it was pretty cold.

From ZCCNE Cookout at Camp Onaway 2011


Mike's Z32 300zx is stunning as ever.

From ZCCNE Cookout at Camp Onaway 2011


Mhmmm..

From ZCCNE Cookout at Camp Onaway 2011


My favorite car of the meet was this 1974 260z 2+2. The only one I've ever seen.

From ZCCNE Cookout at Camp Onaway 2011


Awesome.

From ZCCNE Cookout at Camp Onaway 2011


And someone brought a totally awesome woody to the cookout.

From ZCCNE Cookout at Camp Onaway 2011


From ZCCNE Cookout at Camp Onaway 2011


Nice.

From ZCCNE Cookout at Camp Onaway 2011


Gene took us for a hike all around the property.

From ZCCNE Cookout at Camp Onaway 2011


Excellent views of the lake.

From ZCCNE Cookout at Camp Onaway 2011


From ZCCNE Cookout at Camp Onaway 2011


From ZCCNE Cookout at Camp Onaway 2011


Till next year!

From ZCCNE Cookout at Camp Onaway 2011


From ZCCNE Cookout at Camp Onaway 2011

Thursday, October 27, 2011

Lollerskates

From Z3


Now I can push this thing all around my garage.

From Z3


From Z3


I got all four for half off from Harbor Freight. Really stoked on them.

Saturday, October 22, 2011

About that time... - Mounted and balanced

From Z3


Doing all I can to get the front suspension installed tomorrow. Then its time to get fitted!!!

Friday, October 21, 2011

Monday, October 17, 2011

Hooked up - Suspension install

Big shout out to my buddy Ethan who came up this passed weekend and helped me with my suspension. Helps to have a second brain and a couple extra hands. :)

Rear Driver side Ground Control coil-overs installed.

From Z3


Read Passenger side coil-overs installed.

From Z3


Rear Lower Control Arms installed on adjustable G-Machine aluminum bushings.

From Z3


Keeping it Dirty with the steering rack and crossmember. :)

From Z3


And last but not least we installed the Front LCAs also with the G-Machine adjustable aluminum bushings.

From Z3


Still have to install the front strut towers but should be well on my to that by tonight.

Almost ready to set her down to test ride height and fitment!

Saturday, October 8, 2011

SquaQr Launching at Formula Drift with the help of Racecrowds!

Hey all. I'm sure you might have been wondering why I haven't been posting any updates lately on my Z.

The truth is that I have been preoccupied with launching my first company with my good friend Jose Lugo Jr.

Its called SquaQr (pronounced Squawker) and we are launching this weekend at the Formula Drift Title Fight in Irwindale, CA with the help of RACECROWDS.com.


If you go there and you see a bunch of QR code stickers all over the place, you can scan them and enter to win a Need For Speed Games pack courtesy of Formula Drift, Need for Speed, and Racecrowds.


We developed the mobile platform that the give away runs on!


If you go to Formula Drift in Irwindale this weekend check it out and let us know what you think!


If you wanna help a brotha out, Like our facebook page!


We got hoooked up with the Formula Drift gig through Tom at Racecrowds. They do sweet deals on Motorsports events like FD.


And of course a big thanks to Formula Drift for letting us launch at the raddest Drift event in the history of history.

Monday, September 12, 2011

Bangkok Beater

I don't care how many people posted this. I am so inspired by Nakai-San and his artwork that I have to post this.

Making of RWB Bangkok from TennXX on Vimeo.


And I bought a new winter beater!

From Instant Upload


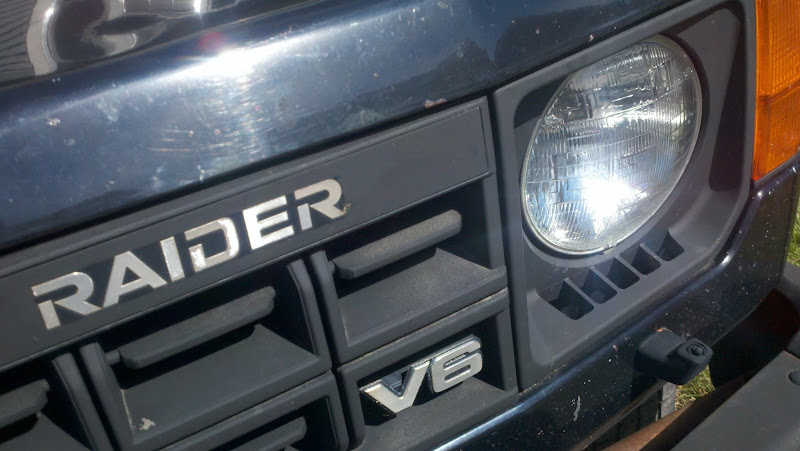
A 1989 Dodge Raider 4x4 with a fuel injected 3.0 V6.

From Instant Upload


From Instant Upload


Definitely the first time RWB and a Dodge Raider were mentioned in one post!

Thursday, September 8, 2011

Rear suspension, RLCAs

Next up was the rear suspension.

First thing i had to do was re-attach the RLCAs using the spindle pin.

From Z3


I expected this to be a monster pain in the ass, but it just hammered right in with a TON of anti-seize.

From Z3


both sides.

From Z3


All done yo!

From Z3


Super pumped.

Getting ready to start re-installing the suspension system.

Can't wait!

Wednesday, September 7, 2011

Back in the game! - Suspension, Wheel Bearings, Rotors

Big thanks to Nick and Bryan for getting me off my ass and back up and working on my Z. Also, big thanks to Zeead for coming over this weekend to help me out. Couldn't have got this done w/o you.

Your builds inspire me yo.

So in case you don't remember I left off having just finished assembling my rear hubs with new wheel bearings and extended lug studs.

From Z3


So next up was the front wheel bearings.

I hammered in the extended studs to the hub.

From Z3


And attached the front brake rotors.

From Z3


I stuffed the wheel bearings in a bag with the grease to lube them up without getting the bearings dirty or getting myself covered in grease.

From Z3


Heavy lubing the races.

From Z3


Install inner bearing and seal. More lube.

From Z3


Then I installed them to the front hubs.

From Z3


From Z3


Then install the outer wheel bearing and more grease.

From Z3


Torque down the castle nut and hammer in the cotter pin. Bang the grease cap on and you're done.

Here is a pic with the spring and strut cartridge installed.

From Z3


From Z3


More to come.
Time for bed!