Showing posts with label Floors. Show all posts

Friday, April 22, 2011

Floors are done.

Finally.

From Z2


From Z2


All sealed up with Zero rust. The frame rails were super rust free but definitely crushed a bit by retard lift operators.

We call them custom concave frame rails. For decreased rigidity... :(

Tuesday, March 29, 2011

Gutted and Sealed

So I finally got around to gutting the rest of the under dash and kick panel wires and crap.

From Z2


Relays and kick panels.

From Z2


Pedal box and that dreadful firewall insulation.

From Z2


Feeling motivated, I fired up the compressor and got to spray sealing.

From Z2


Driver side floor, all welded up with two coats of Zero Rust.

From Z2


Passenger side floor welded up with two coats of Zero Rust.

From Z2


From Z2


From Z2


So the interior floors are done for now. All I really have left to do in there is sound deadening and carpets. I am considering doing a double layer sound deadener because I really want the interior of the car to feel less like a tin can than it did last summer.

Body panels next.

Tuesday, December 14, 2010

Welding Shit up!

Finally got my hands on a welder!

From Z2


Tim brought over his Hobart 110v Mig welder. It was running solid core 22ga. copper coated wire. He also brought an awesome Craftsman air cutter, and a die grinder.

I brought the beer.

From Z2


As you can see the seat bracket was broken by the previous owner, and there is a little hole under the floor mat hook that needs to be ground out and patched up.

From Z2


We marked out the lines that we would have to cut off of the seat bracket so we are able to make nice straight welds and ensure that the seat bracket will hold up.

From Z2


This die grinder was perfect for cleaning up the holes in the floor.

From Z2


It was gentle enough so that it was difficult to remove more material than we had to, which is great since we just wanted to remove the corroded rusty shit.

From Z2


We just hit this with a wire brush and it was ready to go.

From Z2


I have to get one of these rotary cutters.

From Z2


It literally cut through 16ga steel like butter.

From Z2


Finishing cutting out the junk metal.

From Z2


I just picked up a small plate of 16ga steel at Home Depot. Cut it up with some tin snips and clamped it on.

From Z2


WELDING!!!

From Z2


From Z2


From Z2


Not too shabby for my first welds ever! :D

From Z2


The first run on the seat bracket is complete.

I need to grind down my giant welds and patch up the inevitable holes and such. I need this to be a pretty diesel bracket as I am a beast and will surely break it if it is weak. I will also be tacking up the floors next.

Big thanks to Tim for coming over and teaching me how to weld. I can't wait to get my own gear and start fabbing up my own gear!

Tuesday, October 12, 2010

Floor Restore - pt.1

Last you heard I had removed the Sound Deadener from the floors and tranny tunnel.

From Z


After taking a much needed break from the floors I returned with powertools!

From Z


This proved to be very effective at removing surface rust from around the plug holes, and the crevices where the interior paint had failed to protect the sheet metal.

And what kind of floor party would it be without a stripper!

From Z


Whenever you are getting down and dirty with strippers, always use protection.

From Z


'Bout to get my FRICTION ON! :D

From Z


Ok enough stripper jokes.

Apply the milky translucent fluid to the body (ok now I'm really done) and wait about 15 minutes.

From Z


Now scrub the peeling paint with a coarse pad of steel wool.

From Z


She looks a bit raw after blasting her with my tool.

From Z


Looking pretty good so far. So I proceed to the tranny tunnel of doom.

First section goes down smoothly.

From Z


But once I applied the stripper to the side of the tunnel that had some of that dreadful tar crap left on it, it all went to sh#t.

From Z


VOM.

From Z


And.... BANG!

From Z


Like it ain't no thang.

Repeat over and over until the passenger side and tranny tunnel are done.

From Z


One final clean up and application of my new favorite chemical... PickleX 20!!!

From Z


Looking pretty clean guys!

From Z


From Z


The PickleX 20 will convert the rust that was left behind by the rust blaster wheel and keep the bare metal 100% rust free while it waits for paint. This stuff really is magical. Just read the label and look at all the stuff it does!

It even increases the strength of your welds if you pre-treat the metal.
Almost too good to be true.

Stay tuned for the next phase of floor restore.
Next post will be stripper joke free. :(

Sunday, September 12, 2010

Sound DEADener

AAAAAAHHHHHRHRGGGHH!!!!!!!!!!!!!!!!!!

Removing the Sound deadener from the tranny tunnel was the single worst thing I can ever remember doing.

From Z


From Z


From Z


Now I am going to brush on some run of the mill paint stripper to peel up all of the paint and left over tar adhesive from the sound deadener. The stripper will leave the tar a nice soft goo that will be (relatively) easy to remove. I will apply it to the floors and the tranny tunnel, but not before I get my rust treatment chemicals in the mail.

I also picked up some brush wheels and stuff. Expect to see a decent write up of how I take care of my floors since it is such a common problem.

Tuesday, September 7, 2010

Gutted...

So at long last I am doing what every noble 240Z owner must do at some point in their cars life.

Gutting the f*cker.

Here are some old pics of the floors with the sound deadener/rust hider.

Driver:

From Z


Pass:

From Z


Being completely ignorant about everything Z, at the time I though they looked great!

Knowing better now, here is what my floors ACTUALLY look like.

Driver:

From Z


Pass:

From Z


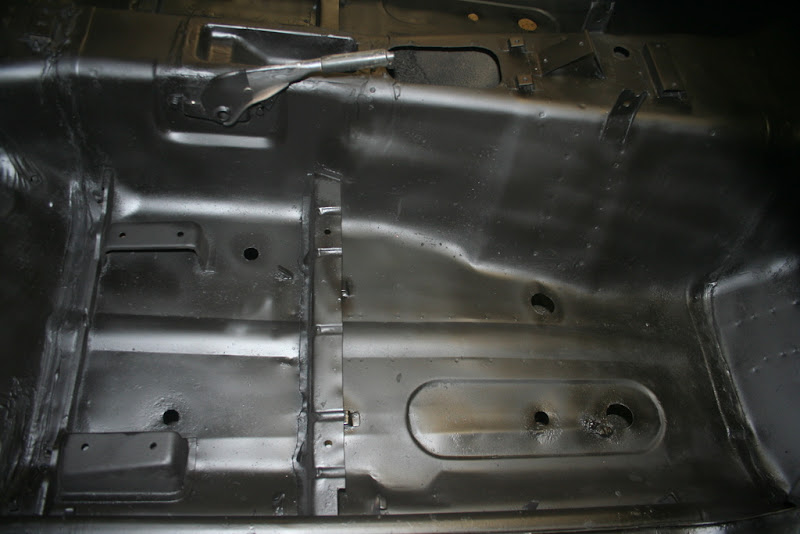
I picked up a pretty hardcore metal brush and some stripper hoping I can get down to bare metal with that and some sand paper. Then I plan to coat with POR-15 which everyone says is the best for stopping rust.


Then I decided to gut the interior. I cant really be 100% sure im getting all of the rust if I cant see everything 100%. So....

I drop the steering shaft and start unplugging stuff.

From Z


From Z


The minute I started finding wires that were connected but were completely different colors, I realized if I kept going without marking them somehow, I would never get this bitch back together.

So I went out to Lowe's and picked up a set of colored electrical tape.

From Z


Now if there are two wires that connect, but it's not completely obvious, I tag both ends with the same colored electrical tape so I can tell what goes where.

Cut out my widshield. lol.

From Z


Kind of a bitch to get out.

From Z


Now it is much easier to get at the dashboard.

One thing I want to mention to anyone who does this.

From Z


Label your screws. I have pulled so many little fasteners and brackets and crap out of this piece of shit. If I didn't have these bags all organized and labeled I'd be absolutely F*CKED!


I continue tagging wires and disconnecting.

From Z


And eventually I was able to get the damn thing out.

From Z


Blam.

From Z


After further inspection, I was able to locate the FOURTH and final mouse house.

From Z


I am officially changing the name of my blog to OldMouseHotelRenovations.blogspot.com.

From Z


Gross.

So natually I couldn't leave that rodent infested heater in there.

From Z


Gonzo.

From Z


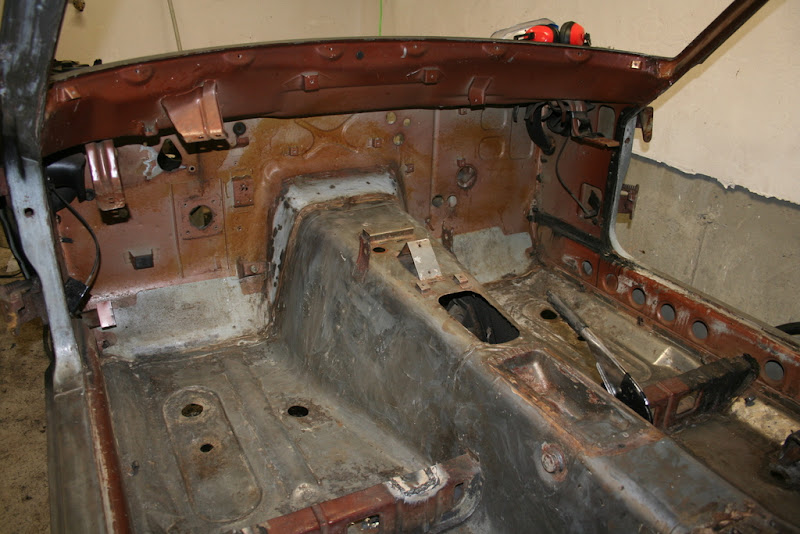
Looking pretty clean for a Dirty S30.

From Z


I can't wait to dive headfirst into rust repair mode.

From Z


More taking shit apart to come.
Stay tuned...